Set up the CUDA Development Environment
Set up the CUDA Development Environment
To set up a CUDA development environment, in addition to installing the CUDA toolkit, you also need to install a C++ compiler. MSVC is a commonly used compiler among them.
1. Install CUDA toolkit
https://developer.nvidia.com/cuda-downloads
2. Install Visual Studio
https://visualstudio.microsoft.com/free-developer-offers
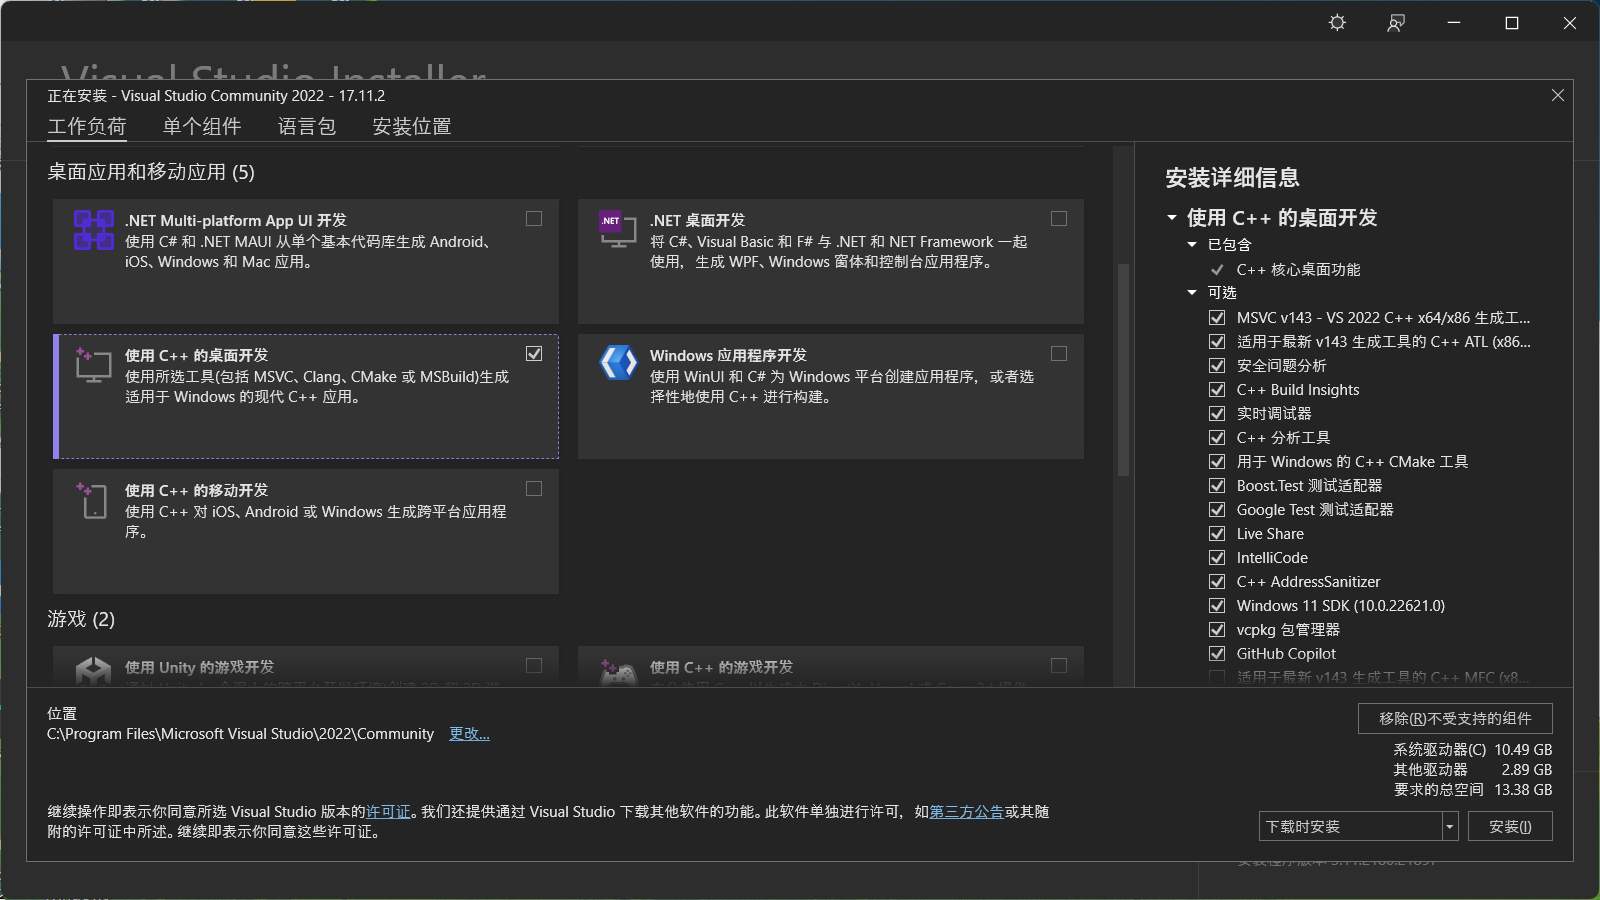
select the C++ component
If the CUDA version is old, it may not support the latest version of the Visual Studio compiler:
fatal error C1189: #error: -- unsupported Microsoft Visual Studio version! Only the versions between 2017 and 2022 (inclusive) are supported! The nvcc flag '-allow-unsupported-compiler' can be used to override this version check; however, using an unsupported host compiler may cause compilation failure or incorrect run time execution. Use at your own risk.
Try downloading a newer version of CUDA.
3. Add cl.exe to Path
If we directly use nvcc to compile C++files, an error message will appear: Cannot find compiler 'cl.exe' in PATH.
So we have to add the path of cl.exe to system variable.
G:\Program Files\Microsoft Visual Studio\2022\BuildTools\VC\Tools\MSVC\14.41.34120\bin\Hostx64\x64
Add this path to the system variable, restart your computer.
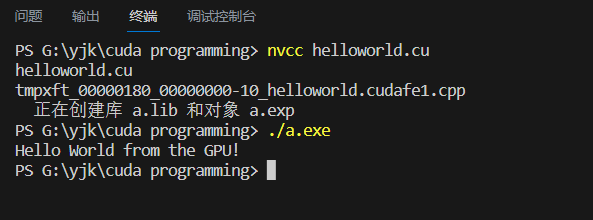
4. Using GPU to output “Hello World”
1 | |
nvcc helloworld.cu
./a.exe

Reference
樊哲勇.CUDA编程基础与实践[M].北京:清华大学出版社,2020.